Encompass Innovation Playbook: Automating Regulation B Tasks
Working with Encompass Innovation Playbooks
![]() Additional Resources/User Guides
Additional Resources/User Guides
The Encompass Innovation Playbooks teach you how to create automated workflows in the Encompass web interface using enhanced conditions, workflow tasks, the workflow engine, and Encompass Partner Connect.
![]() Additional Prerequisites/Assumptions
Additional Prerequisites/Assumptions
PLEASE NOTE: The examples herein are for informational purposes only. Please refer to your company’s Business Compliance & Encompass Administration Policies if you have questions about approved workflows for your organization.
Managing Regulation B (Reg B) Compliance Automation
Use this playbook to set up automation that identifies loans that need loan team members to take action to stay compliant with Reg B Notice of Incomplete Application (NOIA) and credit decision requirements. This automation utilizes notifications, schedulers, tasks, and rules in the Encompass web interface.
![]() What automated workflows are you about to configure?
What automated workflows are you about to configure?
This playbook and referenced user guides provide the steps required to set up this automation in your Encompass instance.
-
From the Encompass web interface's Admin portal, create a new notification template.
-
Select Workflow Management from the left navigation menu, and then select Notification Templates.
-
Select Categories from the tool bar, and then select New Category.
-
Enter Reg B for the Category Name.
-
Select Templates from the tool bar, and then select New Template.
-
-
Enter the notification template details:
-
Name: Type NOIA - Failed Doc Automation sent to Borrower(s) for the notification template name.
-
Description: Configure an applicable description of your choice (optional)
-
Notification Type: Select Encompass Internal users from the dropdown menu
-
Category: Select Reg B from the dropdown menu
-
Recipients > Internal Users: Select Loan Officer and Loan Processor from the dropdown menu
-
Recipients >Additional Emails: Select the additional send types and define the additional email addresses that you intend to send the notification to (optional)
-
Email Content > Subject: Configure your applicable email template subject line.
-
TIP: Field ID’s can be inserted by selecting the < > icon located on the right side of the subject line. This option is used to automatically populate the message with specific fields from the scenario data.

-
-
Email (Body) Content: Configure your applicable body content for this email template
-
TIP: Use the editor tool bar to assist in creating the content for your email template body.

-
-
-
Before saving, activate the notification template by setting the Active toggle to On.
-
Select Save.
-
From the Encompass web interface's Admin portal, create a new scheduler template.
-
Select Workflow Management from the left navigation menu, and then select Scheduler Templates.
-
Select New Template from the tool bar.
-
-
Enter the scheduler template details:
-
Name: Type Reg B NOIA for the scheduler template name.
-
Description: Configure an applicable description of your choice (optional)
-
Calendar Type: Select None (includes all 365 calendar days) from the dropdown menu
-
Time Zone: Select the applicable time zone from the dropdown menu (based on your office location)
-
Complete Duration: For this use case, enter the number 20 for the number of days for the completion timer (or choose an appropriate number of days based on your business compliance policy).
-
Interval: Select the Before button to ensure the scheduler completes before the event date specified in the From field section in next step
-
From: Select Loan Data from the dropdown menu to start the scheduler based on the Encompass date field value specified in next step
-
Date Field ID: Select the Select ID button, and then select Standard Fields at the top of Select Field pop-up screen. Then enter 4984 in search window, select the Search icon, select 4984, and then select Apply. (Field ID 4984 is the Underwriting Decision Due Date.)
-
Complete at (Time of day): Choose the time of day you would like to have Scheduler complete (for example, 8:00 AM)
-
Start from Closest Business Day: Set the toggle for this feature to OFF.
-
TIP: This feature enables scheduler templates to start running on the next business day if the original start date would have been a non-business day.
-
-
-
Before saving, activate the scheduler template by setting the Active toggle to On.
-
Select Save.
-
From the Encompass web interface's Admin portal, create a new scheduler template.
-
Select Workflow Management from the left navigation menu, and then select Scheduler Templates.
-
Select New Template from the tool bar.
-
-
Enter the scheduler template details:
-
Name: Type Reg B Credit Decision for the scheduler template name
-
Description: Configure an applicable description of your choice (optional)
-
Calendar Type: Select None (includes all 365 calendar days) from the dropdown menu
-
Time Zone: Select the applicable time zone from the dropdown menu (based on your office location)
-
Complete Duration: For this use case, enter the number 10 for the number of days for the completion timer (or choose an appropriate number of days based on your business compliance policy)
-
Interval: Select the Before button to ensure the scheduler completes before the event date specified in the From field section in next step
-
From: Select Loan Data from the dropdown menu to start the scheduler based on the Encompass date field value specified in next step
-
Date Field ID: Select the Select ID button, and then select Standard Fields at the top of Select Field pop-up screen. Then enter 4984 in search window, select the Search icon, select 4984, and then select Apply. (Field ID 4984 is the Underwriting Decision Due Date.)
-
Complete at (Time of day): Choose the time of day you would like to have Scheduler complete (for example, 8:00 AM)
-
Start from Closest Business Day: Set the toggle for this feature to OFF.
-
TIP: This feature enables scheduler templates to start running on the next business day if the original start date would have been a non-business day.
-
-
-
Before saving, activate the scheduler template by setting the Active toggle to On.
-
Select Save.
-
From the Encompass web interface's Admin portal, create a new workspace template.
-
Select Workflow Management from the left navigation menu, and then select Workflow Tasks.
-
Select Workspace Templates from the tool bar.
-
Select New.
-
-
Enter the workspace template details:
-
Name: Type Reg Bfor the workspace template name
-
Description: Configure an applicable description of your choice (optional)
-
Tags: Choose one or more applicable tags of your choice (for example, RegB)
-
TIP: Press the <Space Bar> on your keyboard after each tag you add to populate into the Tag field - do not include spaces in your Tags
-
-
Contents: Select the + icon on the right side of the screen, and then follow the steps below to add forms to Workspace Template:
-
Select the Standard Forms dropdown menu in the Contents column, select the Search icon, and then search for and select Underwriter Summary Page 1
-
Select the arrow to move Underwriter Summary Page 1 to the Added Contents column
-
Select the Standard Forms dropdown menu in the Contents column, select the Search icon, and then search for and select Underwriter Summary Page 2
-
Select the arrow to move Underwriter Summary Page 2 to the Added Contents column
-
Select Done
-
-
Content Layout: Select Two Panes. (This setting determines whether the Workspace default screen will show one piece of content or two pieces of content to the end user working the task.)
-
Select Left Pane Default Content: Select Underwriter Summary Page 1
-
Select Right Pane Default Content: Select Underwriter Summary Page 2
-
-
Select Save.
-
From the Encompass web interface's Admin portal, create a new task template.
-
Select Workflow Management from the left navigation menu, and then select Workflow Tasks
-
Select Task Templates from the tool bar
-
Select New Task
-
-
Enter task template details:
-
Name: Type Credit Decision Needed for the task template name.
-
Template ID: Choose an applicable Template ID of your choice (optional).
-
TIP: Template IDs can be used to systematically catalog task templates. Each Template ID must be unique. Leaving the Template ID blank will result in an auto-generated GUID being assigned here.
-
-
-
Select Apply.
-
Enter additional task template details:
-
Expected Duration: Enter the expected task duration of your choice (for example, 2 Days or 24 Hours)
-
Task Date Calculation Calendar Override: Select Standard Calendar from the dropdown menu
-
TIP: Use this if the Task’s due date should be calculated based off a different calendar than the one you pre-configured in Task Global Settings.
-
-
Workspace: Select Reg B from the dropdown list (i.e., the name of the Workspace Template that you created in Step 4 above).
-
NOTE: Only complete this step if the end user responsible for completing the task is using the Encompass web interface.
-
-
Task Type: Select a task type from the drop-down menu (optional). For example, Underwriter Task Type.
-
TIP: Use this feature to control end user’s access to others’ tasks - Task Types must be pre-configured. (For more information, review the Task Types section in the Working with Task-Based Workflows Setup Guide).
-
-
Task Group: Select the Menu icon
 to create an applicable task group of your choice or select a task group from the dropdown menu if an applicable task group was already pre-configured (for example, Reg B).
 -
TIP: Task Groups will help assist in Task selection process during Workflow Rule configurations.
-
-
Assignment: Select Role for default assignment (or optionally choose a different applicable default assignment for this task (such as User Group or Unassigned)
-
TIP: It is advised that you choose a Role or User Group assignment for every Task Template. Unassigned Tasks will not appear on the Task Pipeline.
-
-
Choose Role: Select Underwriter from the dropdown menu (or select the applicable user group from the dropdown menu if User Group was the default value selected for the task assignment in the previous step)
-
Advanced [Assignment] Conditions: N/A
-
NOTE: This setting is optional, but not applicable to this Playbook example. (For more information, refer to the Dynamic Task Attributes section in the Working with Task-Based Workflows Setup Guide.)

-
-
Description: Configure an applicable description of your choice (for example, Credit decision is needed)
-
TIP: This setting is leveraged to provide additional instruction to the end user responsible for completing the Task.
-
-
Advanced [Description] Conditions: N/A
-
NOTE: This setting is optional, but not applicable to this Playbook example. (For more information, review the Dynamic Task Attributes section in the Working with Task-Based Workflows Setup Guide.)

-
-
Priority: Select an applicable default priority setting from the dropdown menu (for example, 5).
-
TIP: This setting will be used on the Task Pipeline to further sort Tasks that are due at the same date/time by determining the priority order in which the Tasks will appear on the list.
-
-
Advanced [Priority] Conditions: N/A
-
NOTE: This setting is optional, but not applicable to this Playbook example. (For more information, review the Dynamic Task Attributes section in the Working with Task-Based Workflows Setup Guide.)

-
-
Who can manually add this to a loan: N/A
-
NOTE: This setting is not applicable to this Playbook example since the example task workflow being configured is intended to add the tasks via automation.
-
-
Sub-Tasks: N/A
-
NOTE: This setting is not applicable to this Playbook example since this example task template does not include any sub-tasks.
-
-
Auto-Complete the Task when Sub-tasks are completed: N/A
-
NOTE: This setting is not applicable to this Playbook example since this example task template does not include any sub-tasks.
-
-
Select Save.
-
From the Encompass web interface's Admin portal, create a new task template.
-
Select Workflow Management from the left navigation menu, and then select Workflow Tasks
-
Select Task Templates from the tool bar
-
Select New Task
-
-
Enter task template details:
-
Name: Type Execute the steps for the Notice of Incomplete Application Process for the task template name
-
Template ID: Choose an applicable Template ID of your choice (optional).
-
TIP: Template IDs can be used to systematically catalog task templates. Each template ID must be unique. Leaving the template ID blank will result in an auto-generated GUID being assigned here.
-
-
-
Select Apply.
-
Enter additional task template details:
-
Expected Duration: Enter the expected task duration of your choice (for example, 1 Days or 24 Hours)
-
Task Date Calculation Calendar Override: Select Standard Calendar from the dropdown menu
-
TIP: Use this if the task’s due date should be calculated based off a different calendar than the one you pre-configured in Task Global Settings.
-
-
Workspace: Select Reg B from the dropdown list (i.e., the name of the workspace template that you created in Step 4 above)
-
NOTE: Only complete this step if the end user responsible for completing the task is working in the Encompass web interface.
-
-
Task Type: Select a task type from the drop-down menu (optional). For example, Processor Task Type.
-
TIP: Use this feature to control end user’s access to others’ Tasks - Task Types must be pre-configured. (For more information, review the Task Types section in the Working with Task-Based Workflows Setup Guide.)
-
-
Task Group: Select the Menu icon
to create an applicable task group of your choice or select a task group from the dropdown menu if an applicable task group was already pre-configured (for example, Reg B)-
TIP: Task Groups will help assist in task selection process during workflow rule configurations
-
-
Assignment: Select Role for default assignment (or optionally choose a different applicable default assignment for this task (such as User Group or Unassigned)
-
TIP: It is advised that you choose a role or user group assignment for every task template. Unassigned tasks will not display on the Task Pipeline.
-
-
Choose Role: Select Loan Processor from the dropdown menu (or select the applicable user group from the dropdown menu if User Group was the default value selected for the task assignment in the previous step)
-
Advanced [Assignment] Conditions: N/A
-
NOTE: This setting is optional, but not applicable to this Playbook example. (For more information, review the Dynamic Task Attributes section in the Working with Task-Based Workflows Setup Guide.)

-
-
Description: Add an applicable description here. For example, Complete Notice of Incomplete Application.
-
TIP: This setting is leveraged to provide additional instruction to the end user responsible for completing the Task.
-
-
Advanced [Description] Conditions: N/A
-
NOTE: This setting is optional, but not applicable to this Playbook example. (For more information, review the Dynamic Task Attributes section in the Working with Task-Based Workflows Setup Guide.)

-
-
Priority: Select an applicable default priority setting from the dropdown menu (for example, 5).
-
TIP: This setting will be used on the Task Pipeline to further sort tasks that are due at the same date/time by determining the priority order in which the tasks will appear on the list
-
-
Advanced [Priority] Conditions: N/A
-
NOTE: This setting is optional, but not applicable to this Playbook example. (For more information, go to Dynamic Task Attributes in the Working with Task-Based Workflows Setup Guide.)

-
-
Who can manually add this to a loan: N/A
-
NOTE: This setting is not applicable to this Playbook example since the example task workflow being configured is intended to add the tasks via automation
-
-
Sub-Tasks: NA
-
NOTE: This setting is not applicable to this Playbook example since this example task template does not include any sub-tasks
-
-
Auto-Complete the Task when Sub-tasks are completed: N/A
-
NOTE: This setting is not applicable to this Playbook example since this example task template does not include any sub-tasks
-
-
Select Save.
This workflow rule automates the start and stop times for the Reg B NOIA Scheduler Template #1 that you created in Step 2 above.
-
From the Encompass web interface's Admin portal, create a new workflow rule.
-
Select Workflow Management from the left navigation menu, and then select Workflow Rules
-
Select New Rule from the tool bar
-
-
Add workflow rule details:
-
Name: Type Reg B NOIA Scheduler for the workflow rule name
-
Priority: Select the appropriate priority for the rule. For example, select High to indicate that the rule is high priority (optional).
-
When is this rule effective: Select an applicable date option in the dropdown menu (optional).
-
Tags: Select an applicable tag for this workflow rule to group the rule with other rules with the same tag (optional). For example, RegB.
-
NOTE: Tags do not support special characters or spaces. When entering a tag, use only letters or numbers or the underscore character; then press the <Enter> key or the <Space Bar> on your keyboard to populate your chosen tag into the field.
-
-
-
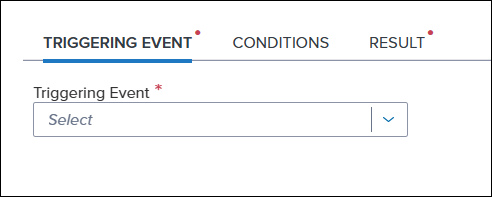
Add a triggering event:

-
Select the Triggering Event tab in the middle of the Workflow Rules/Edit Rule screen
-
Select Field Value Modified from the Triggering Event dropdown list
-
Select the Select ID tab where you will add the fields that, when modified, will trigger this rule.
-
Select the Standard Fields tab
-
Type 4948 in search window, select the Search icon, select 4948, and then select Apply. (Field ID 4948 is the date the application was completed, in accordance with Reg B.)
-
NOTE: A Was Changed field box displays with a default dropdown option of Any Change. This configures the triggering event to fire from any value change made in this field ID.
-
-
Select Add Another
-
Repeat the previous three steps to add these additional fields to the Standard Fields tab:
-
4949 (the date the Notice of Incomplete Application was issued)
-
4984 (the Underwriting Decision Due Date)
-
2301 (the Underwriting Approval Date)
-
2987 (the Underwriting Denied Date)
-
4952 (the date the loan was closed for incompleteness, in accordance with Reg B)
-
-
-
-
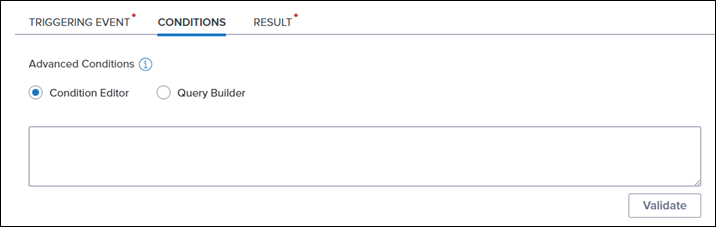
Add Conditions: N/A
-
NOTE: This setting is not applicable to this Playbook example since this example workflow rule does not include any advanced conditions that would apply to All resulting actions
-
-
Set up the workflow rule’s resulting actions:

-
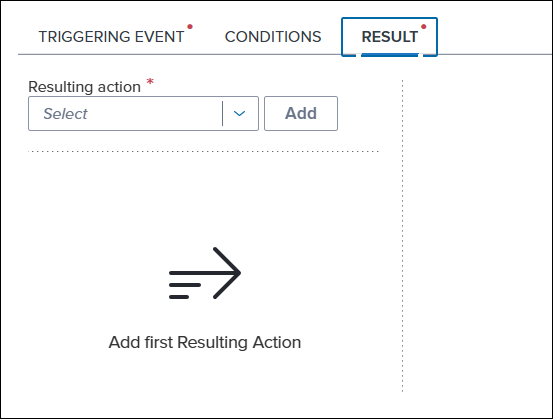
Select the Result tab in the middle of the Workflow Rules/Edit Rule screen.
-
Resulting Action [#1]: Select Start Scheduler from the Resulting Action dropdown list, and then select Add.
-
Enter an applicable description to provide a quick reference in the Added Resulting Actions list (optional). For example, Start Reg B NOIA Scheduler
-
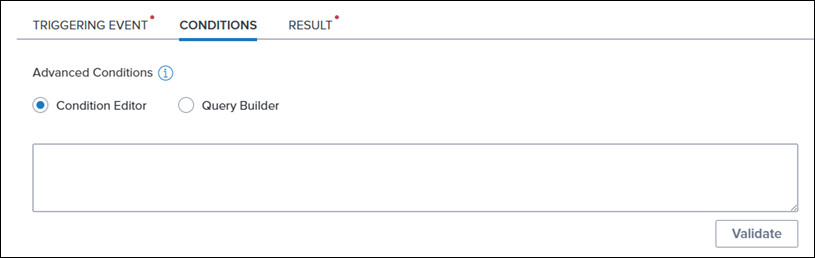
Copy and paste the following conditions description into the Advanced Conditions field:
(IsEmpty([4949]) AND IsEmpty([2301]) AND IsEmpty([2987]) AND IsEmpty([4952])) -
Select Validate
-
Select Reg B NOIA from the Select Scheduler dropdown menu (i.e., the name of Scheduler Template #1 that you created in Step 2 above)
-
-
Resulting Action [#2]: Select Cancel Scheduler from the Resulting Action dropdown list, and then select Add.
-
Enter an applicable description to provide a quick reference in the Added Resulting Actions list (optional). For example, Cancel Reg B NOIA Scheduler.
-
Copy and paste the following conditions description into the Advanced Conditions field:
(Not IsEmpty([4949]) OR Not IsEmpty([2301]) OR Not IsEmpty([2987]) OR Not IsEmpty([4952])) -
Select Validate
-
Select Reg B NOIA from the Select Scheduler dropdown menu (i.e., the name of Scheduler Template #1 that you created in Step 2 above)
-
-
Select Save.
-
Activate the workflow rule by setting the Active toggle to On.

This workflow rule automatically creates a task for the loan processor to complete the notice of incomplete application (i.e., the name of the Task Template #2 that you created in Step 6 above). This automation will be triggered by the completion of the Reg B NOIA scheduler template you created in Step 2 above.
-
From the Encompass web interface's Admin portal, create a new workflow rule.
-
Select Workflow Management from the left navigation menu, and then select Workflow Rules
-
Select New Rule from the tool bar
-
-
Enter workflow rule details:
-
Name: Type Reg B NOIA Task for the Workflow Rule Name
-
Priority: Select the appropriate priority for the workflow rule (optional). For example, select High to indicate that the rule is high priority.
-
When is this rule effective: Select an applicable date option in the dropdown menu (optional).
-
Tags: Select an applicable tag for this workflow rule to group the rule with other rules with the same tag (optional). For example, RegB.
-
NOTE: Tags do not support special characters or spaces. When entering a tag, use only letters or numbers or the underscore character; then press the <Enter> key or the <Space Bar> on your keyboard to populate your chosen tag into the field.
-
-
-
Add a triggering event:
-
Select the Triggering Event tab in the middle of the Workflow Rules/Edit Rule screen
-
Select Scheduler Completed from the Triggering Event dropdown list
-
Select Reg B NOIA from the Selected Scheduler dropdown list (i.e., the name of Scheduler Template #1 that you created in Step 2 above).
-
-
Add Conditions: N/A
-
NOTE: This setting is not applicable to this Playbook example since this example workflow rule does not include any advanced conditions that would apply to All resulting actions.
-
-
Set up the workflow rule's resulting action:
-
Select the Result tab in the middle of the Workflow Rules/Edit Rule screen.
-
Resulting Action: Select Create Tasks from the Resulting Action dropdown list, and then select Add.
-
Enter an applicable description to provide a quick reference in the Added Resulting Actions list (optional). For example, Assign the Complete Notice of Incomplete Application Task.
-
Copy and paste the following conditions description into the Advanced Conditions field:
(IsEmpty([4949]) -
Select Validate
-
To allow duplication, optionally set the Allow Duplication toggle to On
-
NOTE: When turned ON, the task template that is selected for the workflow rule’s Resulting Action will be added to the loan as many times as the trigger event occurs.

-
-
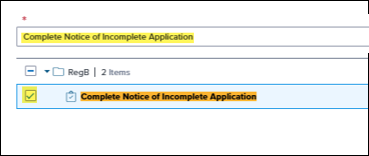
Enter Complete Notice of Incomplete Application in the Select a Task below window (i.e., the name of task template #2 that you created in Step 6 above).
-
Select the checkbox for the Complete Notice of Incomplete Application task template.
-
-
-
Select Save.
-
To activate the workflow rule, set the Active toggle to On.
This workflow rule automates the start and stop times for the Reg B Credit Decision Scheduler Template #2 you created in Step 3 above.
-
From the Encompass web interface's Admin portal, create a new workflow rule.
-
Select Workflow Management from the left navigation menu, and then select Workflow Rules
-
Select New Rule from the tool bar
-
-
Enter workflow rule details:
-
Name: Type Reg B Credit Decision Scheduler for the workflow rule name
-
Priority: Select the appropriate priority for the workflow rule (optional). For example, select High to indicate that the rule is high priority.
-
When is this rule effective: Select an applicable date option in the dropdown menu (optional).
-
Tags: Select an applicable tag for this workflow rule to group the rule with other rules with the same tag (optional). For example, RegB.
-
NOTE: Tags do not support special characters or spaces. When entering a tag, use only letters or numbers or the underscore character; then press the <Enter> key or the <Space Bar> on your keyboard to populate your chosen tag into the field.
-
-
-
Add a triggering event:

-
Select the Triggering Event tab in the middle of the Workflow Rules/Edit Rule screen
-
Select Field Value Modified from the Triggering Event dropdown list
-
Select the Select ID tab where you will add the fields that, when modified, will trigger this rule.
-
Select the Standard Fields tab
-
Enter 4948 in search window, select the Search icon, select 4948, and then select Apply. (Field ID 4948 is the date the application was completed, in accordance with Reg B.)
-
NOTE: A Was Changed field box appears with a default dropdown option of Any Change - this configures the triggering event to fire from any value change made in this field ID.
-
-
Select Add Another.
-
Repeat the previous three steps to add these additional fields to the Standard Fields tab:
-
4984 (the Underwriting Decision Due Date)
-
2301 (the Underwriting Approval Date)
-
2987 (the Underwriting Denied Date)
-
4952 (the date the loan was closed for incompleteness, in accordance with Reg B)
-
-
-
-
Add Conditions: N/A
-
NOTE: This setting is not applicable to this Playbook example since this example workflow rule does not include any advanced conditions that would apply to All resulting actions.

-
-
Set up the workflow rule’s resulting actions:
-
Select the Result tab in the middle of the Workflow Rules/Edit Rule screen.
-
Resulting Action [#1]: Select Start Scheduler from the Resulting Action dropdown list, and then select Add.
-
Type an applicable description to provide a quick reference in the Added Resulting Actions list (optional). For example, Start Reg B Credit Decision Scheduler.
-
Copy and paste the following conditions description into the Advanced Conditions field:
(IsEmpty([2301]) AND IsEmpty([2987]) AND IsEmpty([4952])) -
Select Validate
-
Select Reg B Credit Decision from the Select Scheduler dropdown menu (i.e., the name of Scheduler Template #2 that you created in Step 3 above).
-
-
Resulting Action [#2]: Select Cancel Scheduler from the Resulting Action dropdown list, and then select Add.
-
Enter an applicable description to provide a quick reference in the Added Resulting Actions list (optional). For example, Cancel Reg B Credit Decision Scheduler.
-
Copy and paste the following conditions description into the Advanced Conditions field:
(Not IsEmpty([2301]) OR Not IsEmpty([2987]) OR Not IsEmpty([4952])) -
Select Validate
-
Select Reg B Credit Decision from the Select Scheduler dropdown menu (i.e., the name of Scheduler Template #2 that you created in Step 3 above).
-
-
Select Save.
-
To activate the workflow rule, set the Active toggle to On.
This workflow rule automatically creates a Credit Decision Needed task for the loan underwriter to complete. This automation will be triggered by the completion of the Reg B Credit Decision scheduler template you created in Step 3 above.
-
From the Encompass web interface's Admin portal, create a new workflow rule.
-
Select Workflow Management from the left navigation menu, and then select Workflow Rules
-
Select New Rule from the tool bar
-
-
Enter workflow rule details:
-
Name: Type Reg B Credit Decision Task for the workflow rule name
-
Priority: Select the appropriate priority for the workflow rule (optional). For example, select High to indicate that the rule is high priority.
-
When is this rule effective: Select an applicable date option in the dropdown menu optional
-
Tags: Select an applicable tag for this workflow rule to group the rule with other rules with the same tag (optional). For example, RegB.
-
NOTE: Tags do not support special characters or spaces. When entering a tag, use only letters or numbers or the underscore character; then press the <Enter> key or the <Space Bar> on your keyboard to populate your chosen tag into the field.
-
-
-
Add a triggering event:
-
Select the Scheduler Completed tab in the middle of the Workflow Rules/Edit Rule screen
-
Select Reg B Credit Decision from the Select Scheduler dropdown list
-
-
Add Conditions: N/A
-
NOTE: This setting is not applicable to this Playbook example since this example workflow rule does not include any advanced conditions that would apply to All resulting actions.
-
-
Set up the workflow rule’s resulting action:
-
Select the Result tab in the middle of the Workflow Rules/Edit Rule screen.
-
Resulting Action: Select Create Tasks from the Resulting Action dropdown list, and then select Add.
-
Add an applicable description to provide a quick reference in the Added Resulting Actions list (optional). For example, Create Reg B Credit Decision Needed Task. (optional)
-
Copy and paste the following conditions description into the Advanced Conditions field: N/A
-
NOTE: This setting is not applicable to this Playbook example since this example workflow rule does not include any advanced conditions that would apply to this specific resulting action.
-
-
To allow duplication, optionally set the Allow Duplication toggle to On
-
NOTE: When turned ON, the task template that is selected for the workflow rule’s resulting action will be added to the loan as many times as the trigger event occurs.
-
-
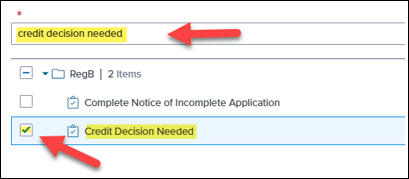
Type Credit Decision Needed in the Select a Task below window (i.e., the name of the task template you created in Step 5 above).
-
Select the checkbox for the Credit Decision Needed task template.
-
- Select Save.
-
To activate the workflow rule, set the Active toggle to On.
This workflow rule automates the process of delivering the Notice of Incomplete Application document to the borrower(s). This automation will be triggered by the completion of the Complete Notice of Incomplete Application task you created in Step 6 above. This workflow rule also automates the delivery of the NOIA - Failed Doc Automation sent to Borrower(s) notification template you created in Step 1 above. This automation will be triggered if a failure to deliver the Notice of Incomplete Application to the borrower(s) should occur.
-
From the Encompass web interface's Admin portal, create a new workflow rule.
-
Select Workflow Management from the left navigation menu, and then select Workflow Rules
-
Select New Rule from the tool bar
-
-
Add workflow rule details:
-
Name: Type NOIA-Document Automation-send to Borrower(s) for the workflow rule name
-
Priority: Select the appropriate priority for the workflow rule (optional). For example, select High to indicate that the rule is high priority.
-
When is this rule effective: Select an applicable date option in the dropdown menu (optional)
-
Tags: Select an applicable tag for this workflow rule to group the rule with other rules with the same tag (optional). For example, RegB.
-
NOTE: Tags do not support special characters or spaces. When entering a tag, use only letters or numbers or the underscore character; then press the <Enter> key or the <Space Bar> on your keyboard to populate your chosen tag into the field.
-
-
-
Add a triggering event:
-
Select the Triggering Event tab in the middle of the Workflow Rules/Edit Rule screen
-
Select Task Completed from the Triggering Event dropdown list
-
Type Complete Notice of Incomplete Application in the Select a Task below window (i.e., the name of the task template you created in Step 6 above).
-
Select the checkbox for the Complete Notice of Incomplete Application task template.
-
Select Success from the With Disposition dropdown list.
-
-
Add Conditions: N/A
-
NOTE: This setting is not applicable to this Playbook example since this example workflow rule does not include any advanced conditions that would apply to All resulting actions.
-
Set up the workflow rule's resulting action:
-
Select the Result tab in the middle of the Workflow Rules/Edit Rule screen.
-
Resulting Action: Select Request/Send Documents from the Resulting Action dropdown list, and then select Add
-
Add an applicable description of your choice to provide quick reference in the Added Resulting Actions list (optional). For example, Send NOIA to borrower(s).
-
Copy and paste the following conditions description into the Advanced Conditions field: N/A
-
NOTE: This setting is not applicable to this Playbook example since this example workflow rule does not include any advanced conditions that would apply to this specific resulting action.
-
-
Select All Borrowers from the Recipients dropdown menu
-
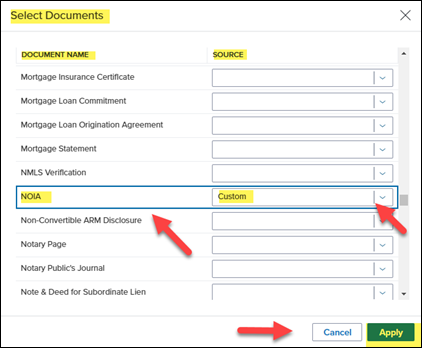
In the Selected Documents section, select the + icon on the right side of the screen
-
In the Select Documents pop-up window, locate NOIA in the Document Name list (or an applicable document that represents a formal Notice of Incomplete Application to the borrower(s)), select Custom from the Source dropdown list, and then select Apply.
-
NOTE: This NOIA document example chosen is a custom print form and must be pre-configured in the Custom Print Form settings in the Encompass desktop interface. (For more information, please refer to Custom Print Forms online help topic.)
-
-
-
Add a nested action:
-
In the Request/Send Documents section, select the Menu icon
to the right of the Request/Send Documents resulting action, and then select Add Nested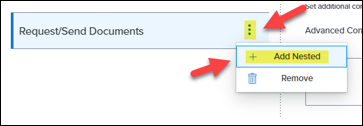
-
In the Resulting Action Configuration section, select On Failure
-
Select Send Notification from the Resulting Nested Action dropdown menu
-
Type an applicable description to provide quick reference for the added nested action (optional). For example, Notification to LO/LP on Failure of NOIA doc automation to Borrower(s)
-
Select the Select Template button.
-
In the Select Notification Template pop-up window, select NOIA-Failed Doc Automation sent to Borrower(s), and then select Apply (i.e., the name of the notification template you created in Step 1 above).
-
-
Select Save.
-
To activate the workflow rule, set the Active toggle to On.
See Also:
The Encompass Innovation Journey (Playbooks)